
Adelaide United vs Brisbane Roar, 2022-23 Australian A-League Women, Regular Season
· Australian A-League WomenAbout
Match Commentary
- 0': Lineups are announced and players are warming up.
- 0': First Half begins.
- 5': Delay in match because of an injury Jessie Rasschaert (Brisbane Roar FC).
- 5': Delay over. They are ready to continue.
- 7': Attempt missed. Katrina Gorry (Brisbane Roar FC) right footed shot from the centre of the box misses to the right.
- 9': Corner, Adelaide United. Conceded by Talitha Kramer.
- 10': Attempt missed. Emilia Murray (Adelaide United) header from the centre of the box misses to the right. Assisted by Isabel Hodgson following a corner.
- 10': Attempt blocked. Paige Hayward (Adelaide United) left footed shot from the centre of the box is blocked. Assisted by Maruschka Waldus.
- 12': Offside, Brisbane Roar FC. Katrina Gorry tries a through ball, but Shea Connors is caught offside.
- 15': Attempt missed. Nanako Sasaki (Adelaide United) right footed shot from outside the box is high and wide to the right. Assisted by Emily Hodgson.
- 17': Foul by Jenna McCormick (Adelaide United).
- 17': Larissa Crummer (Brisbane Roar FC) wins a free kick in the defensive half.
- 18': Offside, Brisbane Roar FC. Talitha Kramer tries a through ball, but Larissa Crummer is caught offside.
- 20': Delay in match (Brisbane Roar FC).
- 21': Delay over. They are ready to continue.
- 21': Attempt saved. Chelsie Dawber (Adelaide United) right footed shot from the right side of the box is saved in the top right corner. Assisted by Jenna McCormick.
- 22': Foul by Katrina Gorry (Brisbane Roar FC).
- 22': Nanako Sasaki (Adelaide United) wins a free kick in the defensive half.
- 28': Chelsie Dawber (Adelaide United) wins a free kick on the right wing.
- 28': Foul by Hollie Palmer (Brisbane Roar FC).
- 33': Foul by Emilia Murray (Adelaide United).
- 33': Jamilla Rankin (Brisbane Roar FC) wins a free kick in the defensive half.
- 34': Attempt blocked. Emilia Murray (Adelaide United) right footed shot from the right side of the box is blocked.
- 34': Foul by Isabel Hodgson (Adelaide United).
- 34': Talitha Kramer (Brisbane Roar FC) wins a free kick in the defensive half.
- 37': Attempt saved. Chelsie Dawber (Adelaide United) right footed shot from the right side of the box is saved in the centre of the goal. Assisted by Nanako Sasaki.
- 39': Hand ball by Indiah-Paige Riley (Brisbane Roar FC).
- 40': Attempt saved. Shea Connors (Brisbane Roar FC) header from the left side of the six yard box is saved in the centre of the goal.
- 44': Foul by Nanako Sasaki (Adelaide United).
- 44': Katrina Gorry (Brisbane Roar FC) wins a free kick in the defensive half.
- 44': Foul by Meisha Westland (Adelaide United).
- 44': Indiah-Paige Riley (Brisbane Roar FC) wins a free kick in the defensive half.
- 45': Attempt blocked. Shea Connors (Brisbane Roar FC) left footed shot from outside the box is blocked. Assisted by Larissa Crummer.
- 45'+1': Delay in match because of an injury Jamilla Rankin (Brisbane Roar FC).
- 45'+1': Delay over. They are ready to continue.
- 45'+2': Foul by Jessie Rasschaert (Brisbane Roar FC).
- 45'+2': Paige Hayward (Adelaide United) wins a free kick on the left wing.
- 45'+2': Maruschka Waldus (Adelaide United) hits the bar with a header from the centre of the box. Assisted by Nanako Sasaki with a cross following a set piece situation.
- 45'+4': First Half ends, Adelaide United 0, Brisbane Roar FC 0.
- 45': Second Half begins Adelaide United 0, Brisbane Roar FC 0.
- 48': Emily Hodgson (Adelaide United) wins a free kick in the defensive half.
- 48': Foul by Indiah-Paige Riley (Brisbane Roar FC).
- 52': Offside, Brisbane Roar FC. Katrina Gorry tries a through ball, but Shea Connors is caught offside.
- 53': Foul by Chelsie Dawber (Adelaide United).
- 53': Talitha Kramer (Brisbane Roar FC) wins a free kick in the defensive half.
- 58': Foul by Maruschka Waldus (Adelaide United).
- 58': Indiah-Paige Riley (Brisbane Roar FC) wins a free kick on the right wing.
- 61': Foul by Ayesha Norrie (Brisbane Roar FC).
- 61': Meisha Westland (Adelaide United) wins a free kick in the defensive half.
- 63': Corner, Adelaide United. Conceded by Katrina Gorry.
- 64': Attempt missed. Jenna McCormick (Adelaide United) header from the centre of the box is close, but misses to the right. Assisted by Nanako Sasaki with a cross following a corner.
- 65': Substitution, Adelaide United. Katie Bowler replaces Paige Hayward.
- 67': Foul by Emily Hodgson (Adelaide United).
- 67': Katrina Gorry (Brisbane Roar FC) wins a free kick in the defensive half.
- 68': Foul by Chelsie Dawber (Adelaide United).
- 68': Shea Connors (Brisbane Roar FC) wins a free kick on the left wing.
- 68': Shea Connors (Brisbane Roar FC) is shown the yellow card for a bad foul.
- 68': Delay in match because of an injury Chelsie Dawber (Adelaide United).
- 71': Delay over. They are ready to continue.
- 72': Corner, Brisbane Roar FC. Conceded by Maruschka Waldus.
- 72': Delay in match because of an injury Dylan Holmes (Adelaide United).
- 72': Delay in match because of an injury Jessie Rasschaert (Brisbane Roar FC).
- 74': Delay over. They are ready to continue.
- 74': Dylan Holmes (Adelaide United) is shown the yellow card.
- 76': Corner, Adelaide United. Conceded by Katrina Gorry.
- 77': Attempt missed. Isabel Hodgson (Adelaide United) right footed shot from outside the box is too high following a corner.
- 77': Substitution, Adelaide United. Sasha Coorey replaces Meisha Westland.
- 78': Foul by Dylan Holmes (Adelaide United).
- 78': Katrina Gorry (Brisbane Roar FC) wins a free kick in the attacking half.
- 78': Goal! Adelaide United 0, Brisbane Roar FC 1. Jessie Rasschaert (Brisbane Roar FC) header from the centre of the box to the bottom right corner. Assisted by Hollie Palmer with a cross following a set piece situation.
- 81': Foul by Katrina Gorry (Brisbane Roar FC).
- 81': Nanako Sasaki (Adelaide United) wins a free kick in the attacking half.
- 82': Katrina Gorry (Brisbane Roar FC) is shown the yellow card for a bad foul.
- 82': Attempt saved. Jenna McCormick (Adelaide United) right footed shot from more than 35 yards is saved in the top right corner. Assisted by Nanako Sasaki.
- 82': Corner, Adelaide United. Conceded by Hensley Hancuff.
- 82': Substitution, Brisbane Roar FC. Sharn Freier replaces Indiah-Paige Riley.
- 83': Foul by Jenna McCormick (Adelaide United).
- 83': Shea Connors (Brisbane Roar FC) wins a free kick in the defensive half.
- 83': Jenna McCormick (Adelaide United) is shown the yellow card for a bad foul.
- 85': Corner, Brisbane Roar FC. Conceded by Nanako Sasaki.
- 86': Foul by Jamilla Rankin (Brisbane Roar FC).
- 86': Sasha Coorey (Adelaide United) wins a free kick in the attacking half.
- 86': Jamilla Rankin (Brisbane Roar FC) is shown the yellow card for a bad foul.
- 87': Attempt saved. Nanako Sasaki (Adelaide United) right footed shot from more than 35 yards is saved in the top centre of the goal.
- 87': Foul by Katrina Gorry (Brisbane Roar FC).
- 87': Katie Bowler (Adelaide United) wins a free kick on the left wing.
- 88': Corner, Adelaide United. Conceded by Talitha Kramer.
- 89': Foul by Shea Connors (Brisbane Roar FC).
- 89': Katie Bowler (Adelaide United) wins a free kick in the defensive half.
- 90': Attempt missed. Emilia Murray (Adelaide United) right footed shot from the right side of the box is too high. Assisted by Nanako Sasaki.
- 90': Substitution, Adelaide United. Melindaj Barbieri replaces Nanako Sasaki.
- 90'+1': Dylan Holmes (Adelaide United) wins a free kick in the attacking half.
- 90'+1': Foul by Katrina Gorry (Brisbane Roar FC).
- 90'+2': Corner, Adelaide United. Conceded by Jessie Rasschaert.
- 90'+3': Foul by Katie Bowler (Adelaide United).
- 90'+3': Katrina Gorry (Brisbane Roar FC) wins a free kick in the defensive half.
- 90'+4': Emilia Murray (Adelaide United) wins a free kick in the defensive half.
- 90'+4': Shea Connors (Brisbane Roar FC).
- 90'+4': Foul by Maruschka Waldus (Adelaide United).
- 90'+4': Shea Connors (Brisbane Roar FC) wins a free kick in the defensive half.
- 90'+8': Second Half ends, Adelaide United 0, Brisbane Roar FC 1.
- 0': Match ends, Adelaide United 0, Brisbane Roar FC 1.
Statistics
 BRI BRI |
ADE |
|
|---|---|---|
| 12 | Fouls | 13 |
| 3 | Yellow Cards | 2 |
| 0 | Red Cards | 0 |
| 3 | Offsides | 0 |
| 2 | Corner Kicks | 6 |
| 4 | Saves | 1 |
| 39.9 | Possession | 60.1 |
| 4 | SHOTS | 12 |
| 2 | ON GOAL | 4 |
| 0.5 | On Target % | 0.3 |
| 0 | Penalty Goals | 0 |
| 0 | Penalty Kicks Taken | 0 |
| 217 | Accurate Passes | 387 |
| 332 | Passes | 500 |
| 0.7 | Pass Completion % | 0.8 |
| 1 | Accurate Crosses | 4 |
| 15 | Crosses | 23 |
| 0.1 | Cross % | 0.2 |
| 57 | Long Balls | 54 |
| 16 | Accurate Long Balls | 25 |
| 0.3 | Long Balls % | 0.5 |
| 1 | Blocked Shots | 2 |
| 12 | Effective Tackles | 12 |
| 19 | Tackles | 18 |
| 0.6 | Tackle % | 0.7 |
| 15 | Interceptions | 23 |
| 16 | Effective Clearances | 18 |
| 16 | Clearances | 18 |
Game Information
Venue: ServiceFM Stadium
Location: Adelaide, Australia
Attendance: 1,045
Line-Ups
 Adelaide United (4-3-3)
| No. | Name |
|---|---|
| 1 | Annalee Grove (GK) |
| 19 | Maruschka Waldus |
| 6 | Jenna Mccormick |
| 2 | Emily Hodgson |
| 11 | Isabel Hodgson |
| 12 | Nanako Sasaki |
| 16 | Dylan Holmes |
| 14 | Meisha Westland |
| 22 | Emilia Murray |
| 9 | Paige Hayward |
| 10 | Chelsie Dawber |
 Brisbane Roar (4-2-3-1)
| No. | Name |
|---|---|
| 51 | Hensley Hancuff (GK) |
| 5 | Jamilla Rankin |
| 23 | Kajsa Lind |
| 17 | Talitha Kramer |
| 3 | Jessie Rasschaert |
| 10 | Katrina Gorry |
| 7 | Ayesha Norrie |
| 19 | Hollie Palmer |
| 9 | Larissa Crummer |
| 12 | Shea Connors |
| 27 | Indiah-Paige Riley |
A-League Women News
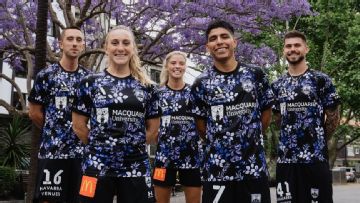
Good things apparently come to those who wait because, three weeks into the A-League season, Sydney FC has only gone and dropped arguably the competition's best kit.
Brisbane's stars ensured the Roar began the season with a win, but the spotlight is on Sydney FC after the Sky Blues broke the league's youngest player record.
Tameka Yallop nets for Brisbane only seven minutes after being substituted as Brisbane take home a dramatic 3-2 victory over Melbourne Victory.
One club in "hibernation," another being propped up one season at a time. The A-League Women is never dull, and there's always a thrill of anticipation as a new season dawns.

As Truro prepare to make the longest round trip for a professional league match in English football history, here's a look at the furthest that teams have to travel every season.